My recipe for Button Mushrooms appeared first on Sunday Supper Movement, where I am a contributor.
Melt-in-your-mouth button mushrooms are caramelized in butter and olive oil and sautéed with garlic and herbs to make a perfect velvety side for steak or any entrée.
 Buttery, herbed mushrooms are the perfect side at your favorite steakhouse, but did you know it only takes 10 minutes to make them yourself at home? They’re a decadent addition to any meal and your family and guests will love them!
 What are button mushrooms?
Button mushrooms (or white mushrooms) are the most common variety of mushroom and can be found at most any grocery store or market. Varying in size, button mushrooms can be small or over an inch in diameter. For this recipe, smaller and more uniform in size mushrooms work best because each mushroom will be bite-sized, but all whole button mushrooms will work.
 White mushrooms are actually the same variety of mushroom as crimini and portobello. Crimini mushrooms are left to grow a little longer than white mushrooms, giving them their rich color and flavor, while portobellos are grown the longest to become large and dense with a meaty flavor.
How to Prepare Button Mushrooms
To get your mushrooms ready for cooking you’ll need to rinse them, making sure any dirt is cleaned off. Then just pat dry with a paper towel. Make sure the mushrooms are completely dry when you begin cooking because this will help get the edges crispy and will ensure your mushrooms don’t end up soggy.
 Button Mushrooms Recipe Ingredients
This quick and easy recipe requires just 8 ingredients:
- 16 oz button mushrooms
- 2 tbsp butter
- 1 tbsp olive oil
- 3 cloves garlic, minced
- 1 tbsp flat leaf parsley, chopped plus more for optional garnish
- 1 tsp thyme, stems removed
- Salt
- Pepper
 How to Cook Button Mushrooms
Cooking up this decadent mushroom recipe could not be easier!
- Rinse mushrooms to remove any dirt and pat dry with a paper towel. Trim any extra long mushroom stems.
- Add butter and olive oil to a large pan over medium-high heat. Let heat until butter is melted.
- Add mushrooms and sprinkle with salt and pepper.
- Let mushrooms cook for 5-7 minutes, stirring infrequently to allow mushrooms to brown and caramelize.
- Reduce heat to medium and add garlic, thyme, and parsley. Cook for 1-2 minutes, until fragrant.
- Toss everything well in the pan, then add to a serving dish, making sure to pour remaining pan drippings over top.
- Sprinkle with remaining parsley for garnish and serve warm.
 Can You Freeze Button Mushrooms?
Fresh mushrooms can be stored in the refrigerator for up to a week but you can also freeze white button mushrooms. Just freezing them raw could result in the mushrooms becoming mushy once thawed but if you sauté them first and then freeze you can put them straight into your recipes from frozen. Use your handy frozen mushrooms for this recipe as well as soups, stews and sauces.
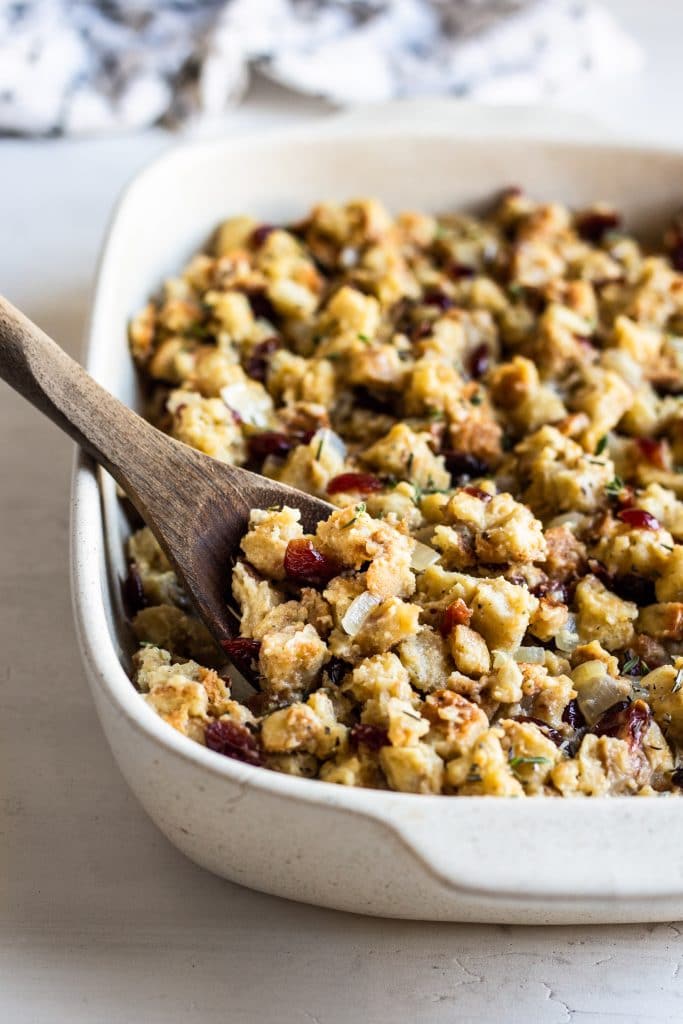
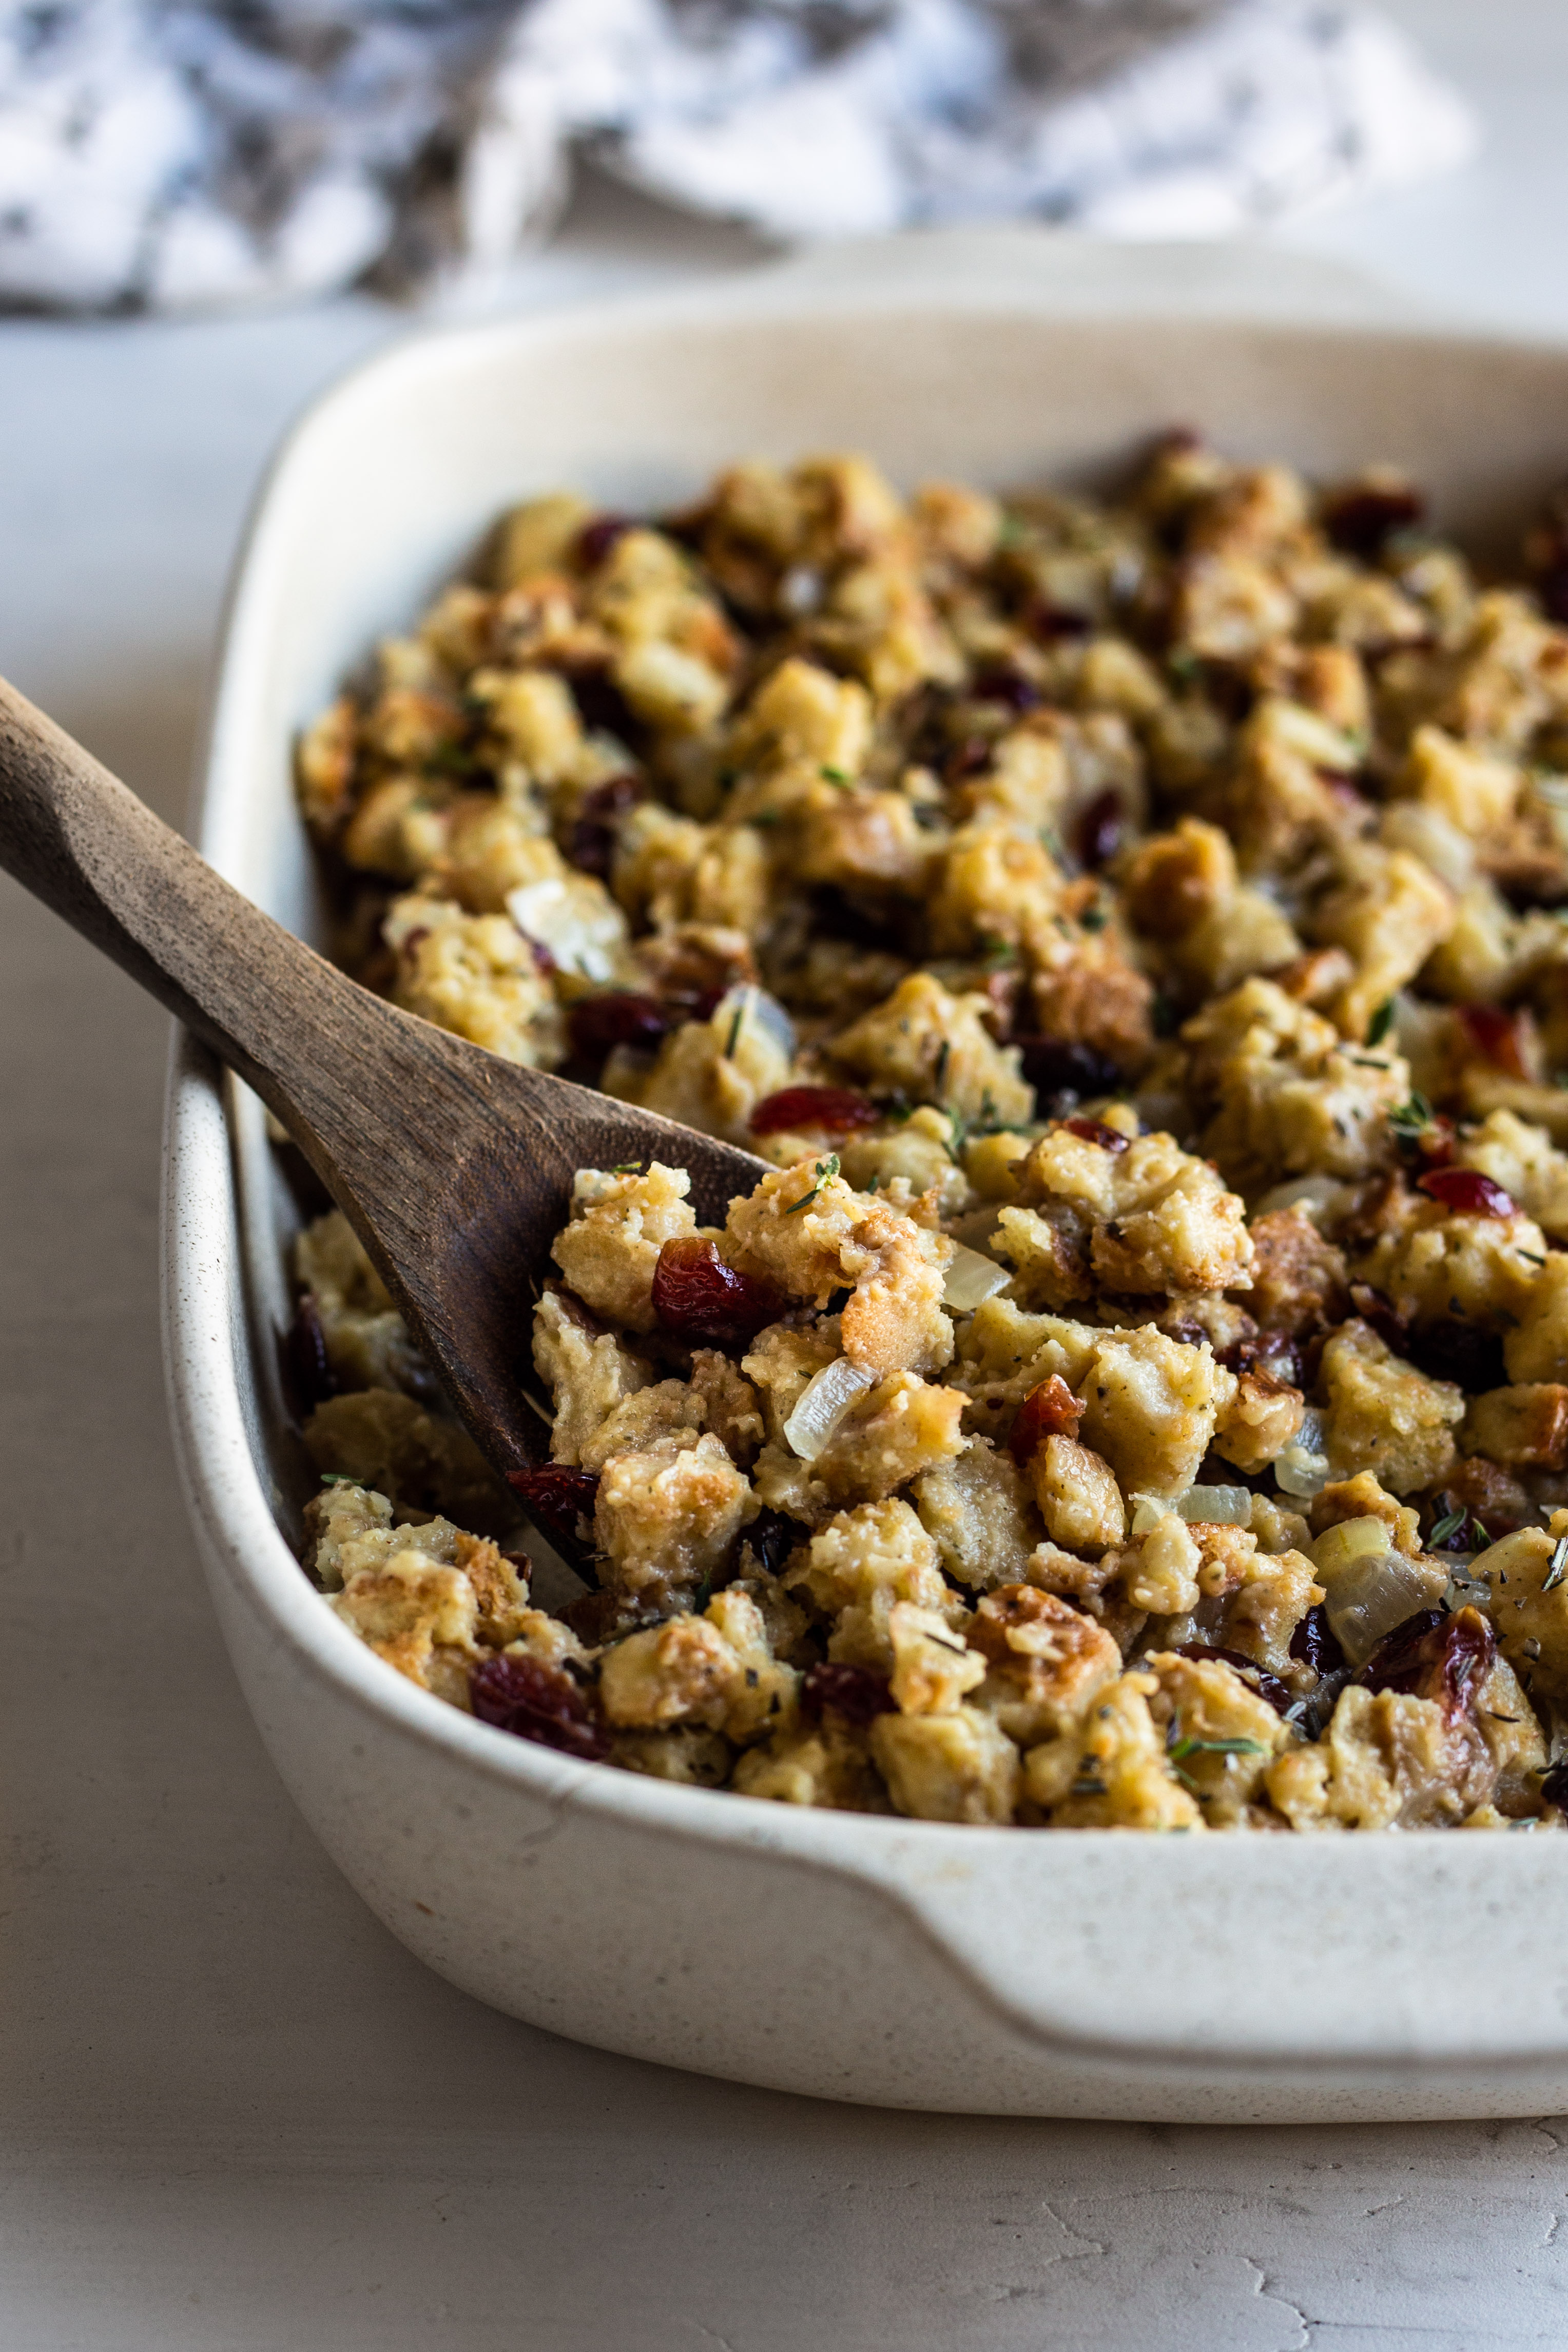
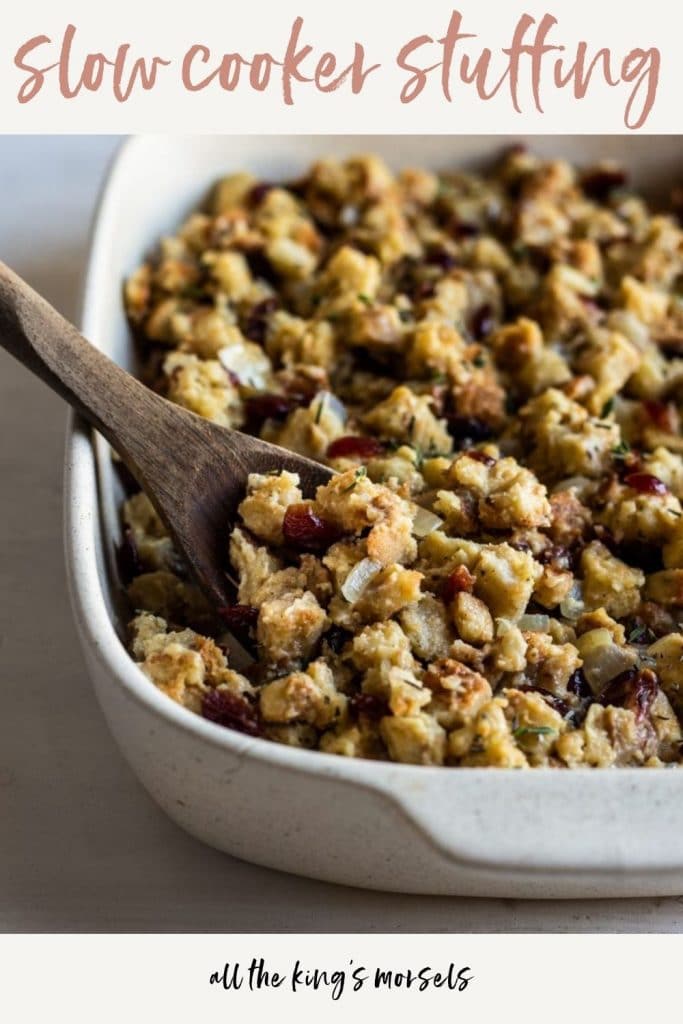
 These heavenly button mushrooms are quick and simple to make but pack the flavor. They pair well with any meat and would be perfect with steaks for a special occasion. This recipe would also be tasty during the fall holidays alongside Slow Cooker Stuffing and Classic Mashed Potatoes and Gravy. It will easily become a much requested favorite in your household!

Let me know what you think of this recipe in the comments below and be sure to tag me on social media and share your creations! @allthekingsmorsels #allthekingsmorsels

Button Mushrooms
Ingredients
Method
- Rinse mushrooms to remove any dirt and pat dry with a paper towel. Trim any extra long mushroom stems.
- Add butter and olive oil to a large pan over medium-high heat. Let heat until butter is melted.
- Add mushrooms and sprinkle with salt and pepper.
- Let mushrooms cook for 5-7 minutes, stirring infrequently to allow mushrooms to brown and caramelize.
- Reduce heat to medium and add garlic, thyme, and parsley. Cook for 1-2 minutes, until fragrant.
- Toss everything well in the pan, then add to a serving dish, making sure to pour remaining pan drippings over top.
- Sprinkle with remaining parsley for garnish and serve warm.
 Today I have a tried and true southern recipe for you: Pineapple Casserole. My version is warm, gooey, rich, buttery, savory, sweet, tangy…I mean it just checks all the boxes. Canned pineapple gets mixed with a sweet and creamy sauce, then topped with sharp cheddar cheese, crunchy cracker crumbs, and melted butter. Then it’s baked until bubbling and golden crispy on top….
 I’m going to go ahead and be bold today and put this out there: This recipe for fried okra is THE EASIEST and THE BEST recipe for fried okra. Yep. I said it. Sometimes the easiest way really is the best way my friends. I promise you will not be able to stop eating these little golden nuggets of goodness!
 Fried okra has always been one of my favorite sides and something we had regularly growing up. My granny would make them for one of her epic suppers she would cook for us when we came to visit. I don’t know her recipe but I know she liked the Moss product brand so that is what I’m using today. My fried okra recipe is so simple because I use seafood breader in place of a mix of cornmeal and spices. I just add a little salt and pepper and it’s ready to go!
 My husband’s favorite side is definitely fried okra so he was more than happy to stand by and do the frying! The process is super quick. You chop up your okra, dip several at a time into buttermilk (get them really good and coated) and then you dredge them in the seafood breader, salt/pepper mixture. I get them really nice and coated so they’re extra crispy and then into the hot oil they go!
 You only need about an inch of vegetable oil in the frying skillet and you’ll know it’s hot enough when you can toss a little amount of the breader in and it begins to sizzle. Add a few pieces of okra at a time and turn once during frying to get them crispy on both sides. Transfer to a plate lined with paper towels to drain and that is it!
 Now you don’t need to dip these since they are so good by themselves but I love a good dip so I threw together a “comeback” or “fry” sauce to go with these and I’ve included the recipe for that as well.
 Have fun enjoying and sharing fried okra. It will go fast! Let me know what you think by commenting below or tagging #allthekingsmorsels and @allthekingsmorsels on social media!
 It’s happening ya’ll. I’m blogging again! It’s March, and so I kind of feel recovered from Christmas now. Can anyone else relate?!? We’ve been a busy family jumping from one thing (and one illness) to another and I’m so ready for spring break!
 This fuss-free salad can be thrown together in a matter of minutes and contains just 5 ingredients: mixed greens, avocado, canned beets, goat cheese, and cilantro. It makes a great side or appetizer for dinner, but I often eat it on its own or with soup for lunch. It makes a great on-the-go lunch by adding all the ingredients to a mason jar. Just start with wettest ingredients on the bottom and finish with your greens on top. Add a lid and then pour it all out on a plate when you’re ready to eat!
 Avocado, beet and goat cheese salad isn’t just pretty and full of flavor. It’s also packed with nutrients. Avocados are full of potassium, fiber, and healthy fats, while beets contain vitamin C and magnesium. Goat cheese is easier to digest than cheese made from cow’s milk which is good for those with dairy sensitivity, and it also contains more vitamins and minerals than cow’s milk. Cilantro contains vitamin K which is great for your skin and those pesky dark under-eye circles, and of course we all know you can never have enough dark leafy greens.
 I hope you’ll add this salad to your rotation and please let me know if you try it by tagging @kristensfixins on social media! I’d love to see your creation. Happy eating!


 Creamy, dreamy, glorious mashed potatoes. My most favorite food in the whole world! With gravy, duh. Can you believe that November starts tomorrow? Thanksgiving will be here in 3 weeks! These classic mashed potatoes and gravy are the perfect dish for your feast so get someone to help you peel your taters and let’s get cooking!
 Mashed potatoes were my favorite food growing up and my love still goes strong. They are the most perfect comfort food, and are made out of real and simple ingredients:
 Now, I know people love to add other things to their mashed potatoes, like cream cheese and sour cream and cheese and garlic and all kinds of stuff. And I love that too. But for Thanksgiving I prefer the simplicity of this recipe and how it pairs so perfectly with turkey and gravy.
 So let’s talk ingredients. I use a whole five pound bag of yukon gold (sometimes called “yellow”) potatoes. They seem to have the best consistency for mashed potatoes in my opinion. I try to use organic ingredients when possible and I also use salted (and prefer grass-fed) butter, but you can use unsalted and then salt to taste if you wish. When you’re buying heavy cream be sure and check the ingredients. The ingredients should be: heavy cream (milk). I have seen heavy creams that have a whole list of ingredients, some that are known carcinogens. It infuriates me! OK, rant over. Moving on!
 How creamy do you like your mashed potatoes? On Thanksgiving I go the extra step of whipping them up with an electric mixer to get that extra smooth and creamy texture, but most of the time I just mash them with a potato masher and mix everything together with a wooden spoon. I enjoy both versions but in case you’re wondering, the textured version is pictured in this blog post.
 Aside from having to peel five pounds of potatoes (and if you like the skins, by all means leave some of them on…also delicious), this version of mashed potatoes and gravy is super easy as you’ll see in the recipe below. After cooking and draining the potatoes you simply mix in the butter and heavy cream, salt and pepper to taste, and garnish with parsley just for a little color if desired.
 And what are mashed potatoes without gravy? OK, they’re still really good. But not as good as they could be! If gravy is something that intimidates you, I am here to tell you – it is such an easy thing to make! If you learn how to make a roux (the first part of making gravy) you will be able to make all kinds of things, most notably cheese sauce for mac and cheese if you have kiddos!
 To make gravy, you need butter and flour. Always equal amounts of both. I always use 2 tablespoons no matter how many I’m cooking for. That usually makes enough for my crowd. Melt the butter over medium heat in a saute pan.
 Once melted add in the flour. I used whole wheat flour here but if you’re new to making gravy maybe start with white flour for a more familiar taste. We have switched to whole wheat everything else so I figured my gravy should be included!
 Whisk continuously for a couple of minutes until a paste has formed. And that is your roux!
 After you make a roux you can add the ingredients to turn it into whatever kind of sauce you’re making. In this case, gravy. Continue to whisk gently while slowly pouring in the chicken broth and then heavy cream. You’ll notice it starting to thicken. If it gets too thick you can add more liquid.
 You can even just splash in a little water as the liquid. It’s not going to hurt a thing. If you’re making this for Thanksgiving and you’re also in charge of the turkey, skim some broth from the bottom of your roaster to use instead of chicken broth. It has a great flavor!
 Alton Brown taught me that the gravy will continue to thicken as you put it in your serving dish and bring it to the table so it’s best if it’s a little thinner than you want. That way when it’s ready to be devoured it will be the perfect thickness! I am going to say to use salt and pepper to taste but for me about 1/2 teaspoon of salt and 1/4 teaspoon of pepper works well, and that’s with using regular sodium canned chicken broth and salted butter.
 You can make the mashed potatoes a couple of days ahead and store covered in the refrigerator to save time on Thanksgiving. I heat them up in a pot and use whole milk to get things stirring.
 Let me know if you try this recipe and how you like it by posting in the comments below or tagging #kristensfixins on social media!
 The end of the summer is officially upon us! I just took my oldest son to Kindergarten orientation this morning and he starts on Tuesday! This is all happening way too fast! I’m definitely more nervous than he is.
 Putting together my squash casserole requires just 8 ingredients and two bowls. To make it, you need:
 This is one of those surprising recipes that make the squash hater in your life take a second bite. I mean, coat vegetables in a creamy sauce with cheese and most people are on board, am I right? Casseroles are such a great comfort food and my most favorite thing to make. In my house they call me the casserole queen! (And the gravy master…but we can talk about gravy another day…).
 Since this is one of those classic southern recipes with canned soup and packaged stuffing mix, I thought I’d talk about how you could make it a little healthier if you so choose. The squash is initially cooked in olive oil so that part is good! I’ve seen a couple brands of organic stuffing mix and I’ve also seen versions online with no added sugar (that stuff sneaks into everything). Pacific Foods and Amy’s make organic cream of mushroom soup, and if you prefer not to use sour cream, you could use greek yogurt. Just be sure to use whole milk yogurt so it will have the thick and creamy texture that sour cream has. You can substitute this as a 1:1 ratio, so it’s a very easy swap!
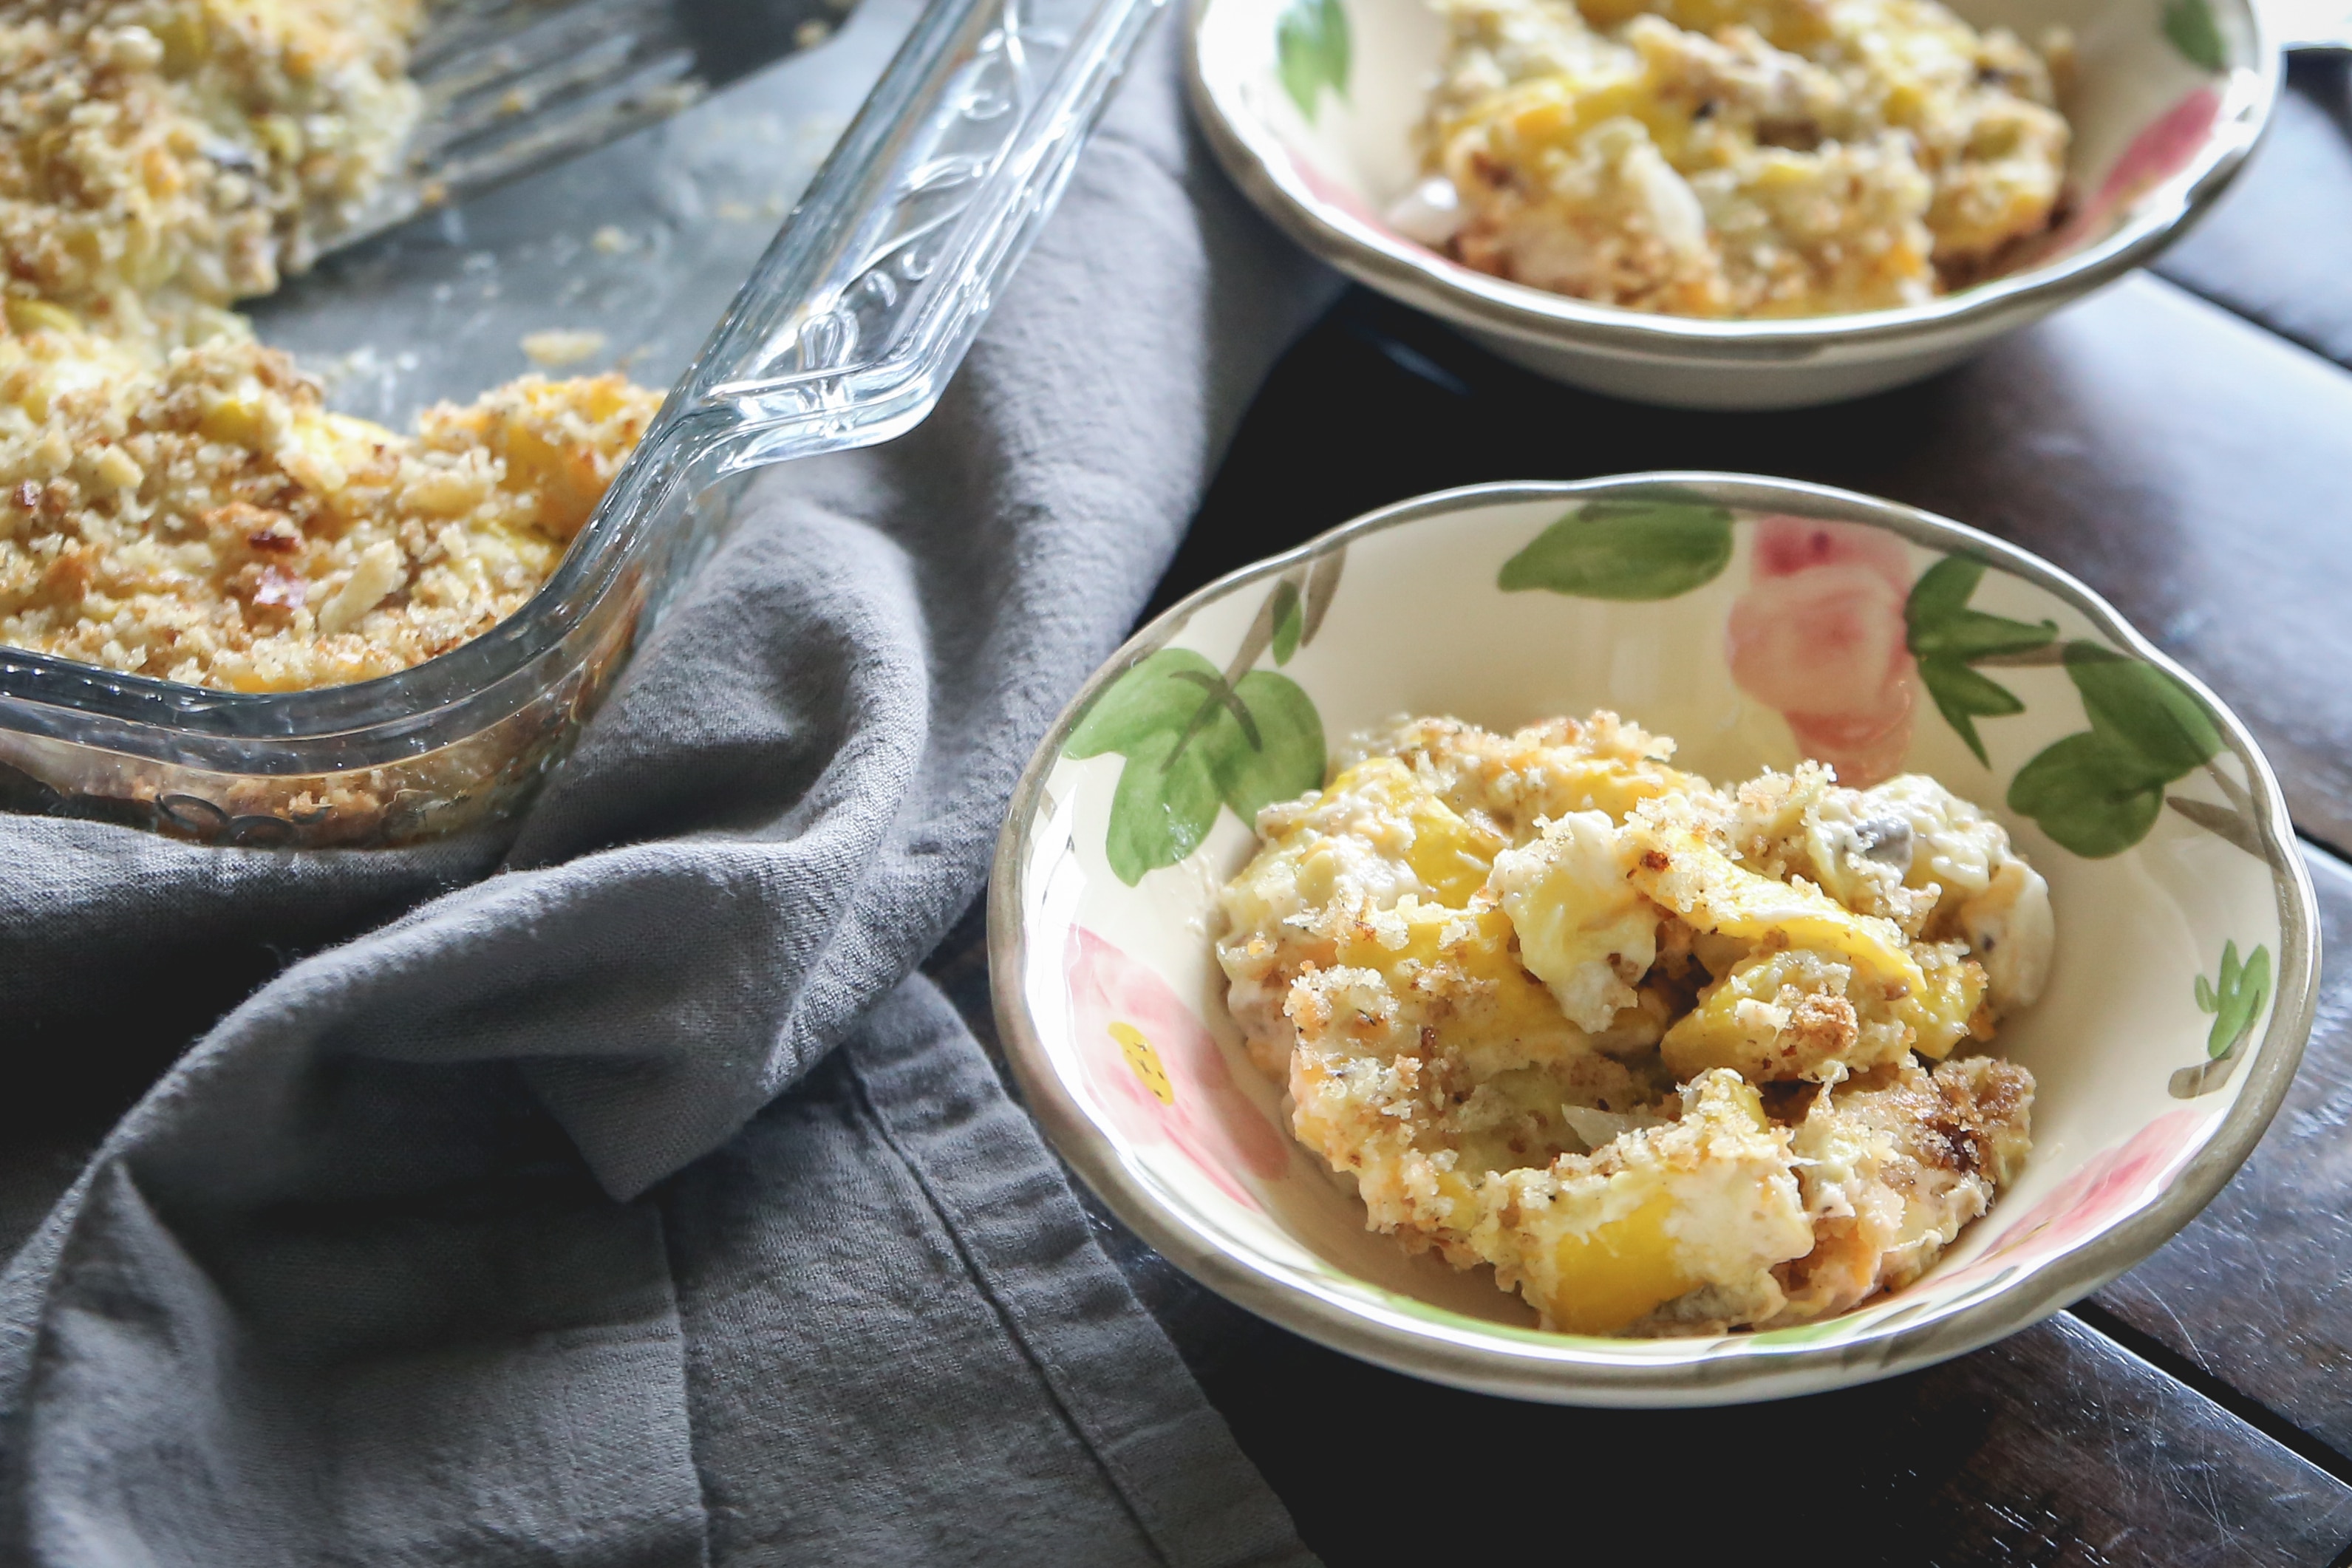 Please share your substitution ideas with me and let me know how yours turns out! Squash casserole is a definite crowd pleaser and I hope you’ll try it out for your crowd soon.
 Be sure to tag #kristensfixins on social media and let me know how you like the recipe!
 Hello hello! Today I’m sharing a simple, classic coleslaw recipe that I call Tangy Southern Coleslaw. This easy coleslaw is cool and refreshing and perfect as a side or topping for burgers, hotdogs, and pulled pork. In this post I’m going to teach you how to make coleslaw with mayo and just a couple of other ingredients!
 This recipe came from my dad, except that it would never be a recipe if it weren’t for me! My dad is one of those really good cooks that just wings it and everything always turns out perfect. Ask him how he made this delicious dish and you’ll get a response like, “oh it’s nothing but cabbage and mayonnaise, salt and pepper.” Yet when you try to make it, it tastes nothing like his. This has annoyed me more than once in my life. So one summer I watched him make the slaw and had him measure everything out while I wrote it down. After adding a couple of my own tweaks I now have my favorite classic coleslaw recipe! Thanks, Dad!
 When it comes to coleslaw, some like it sweet and some like it savory. If you’ve tried many varieties of coleslaw in your life you probably know which one you prefer. This one is way on the savory/tangy side, which is my preference. If you love your coleslaw sweet, no problem. You’re just going to need to add more sugar.
 Basic Coleslaw Recipe
 How to Make Coleslaw
 This dish can be made the day before and stored covered in the refrigerator overnight. If you want to serve it right it away, just try to let it sit out for about 30 minutes to let the flavors combine a bit. I’ve also heard the question asked, “Can you freeze coleslaw?” and I’d have to say no. The mayonnaise will try to separate, making the consistency not as great as when it was fresh. However, you can store it in the refrigerator for several days .
 Tangy Southern Coleslaw is a perfect quick side for warm month cookouts and potlucks. And believe it or not, due to the simplicity of this recipe, it is a low calorie coleslaw with just 84 calories per serving!
